Tuesday, December 24, 2013

The Last Look at Christmas 2013

 I love this season so much!
Can't get enough of it.


James bought me this awesome wooden antique bowl in South Carolina this fall.
I wanted to bring back a treasure & this fit the bill.


A branch of pine greenery & some fancy pine cones fill it perfectly.


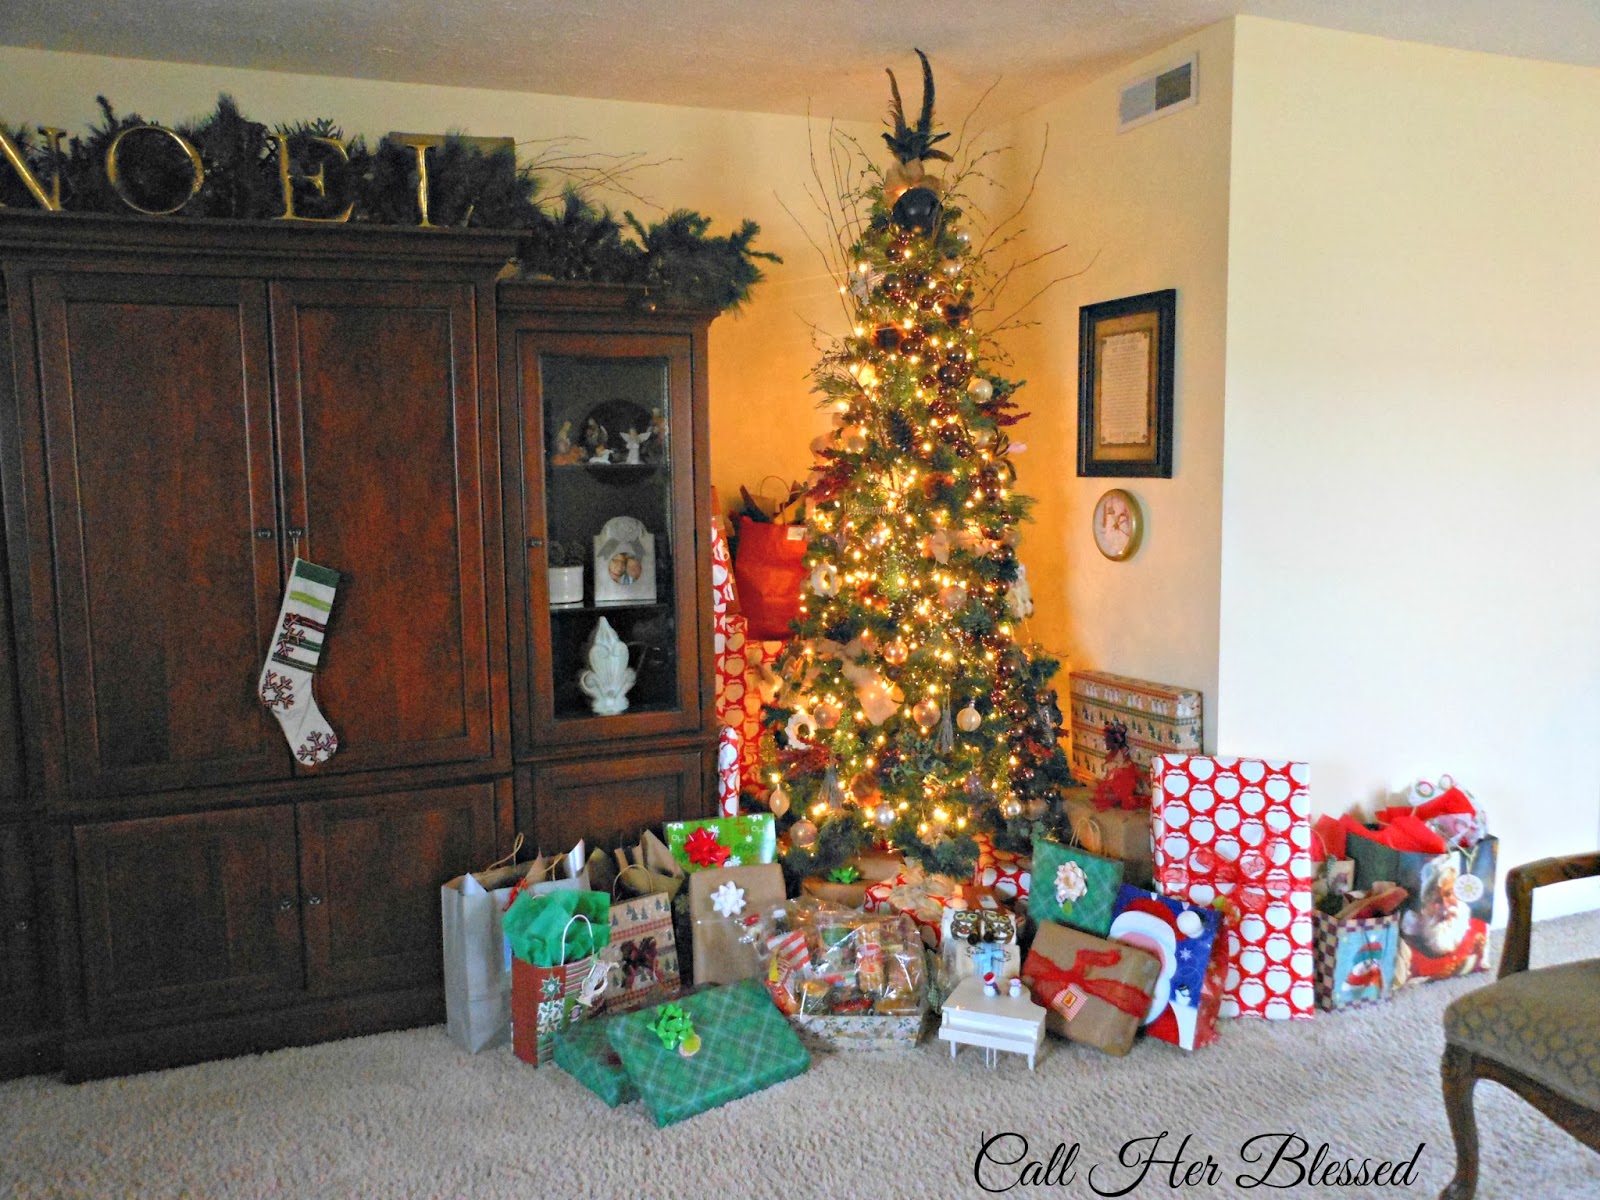
The gift stack grew and grew ...  whew, that's a lot of boxes under there.


This deer pillow is a new addition ... isn't he festive?


And I got 2 new lamps a few weeks ago.
We were needing a couple lamps for bedrooms upstairs, so I did a switch-a-roo.
I'll show you more of these later on.


Here's my piano in her Christmas finery.


The window pane, antique mirror, along with the burlap banner have been here for a while ...
I like them to well to move them.


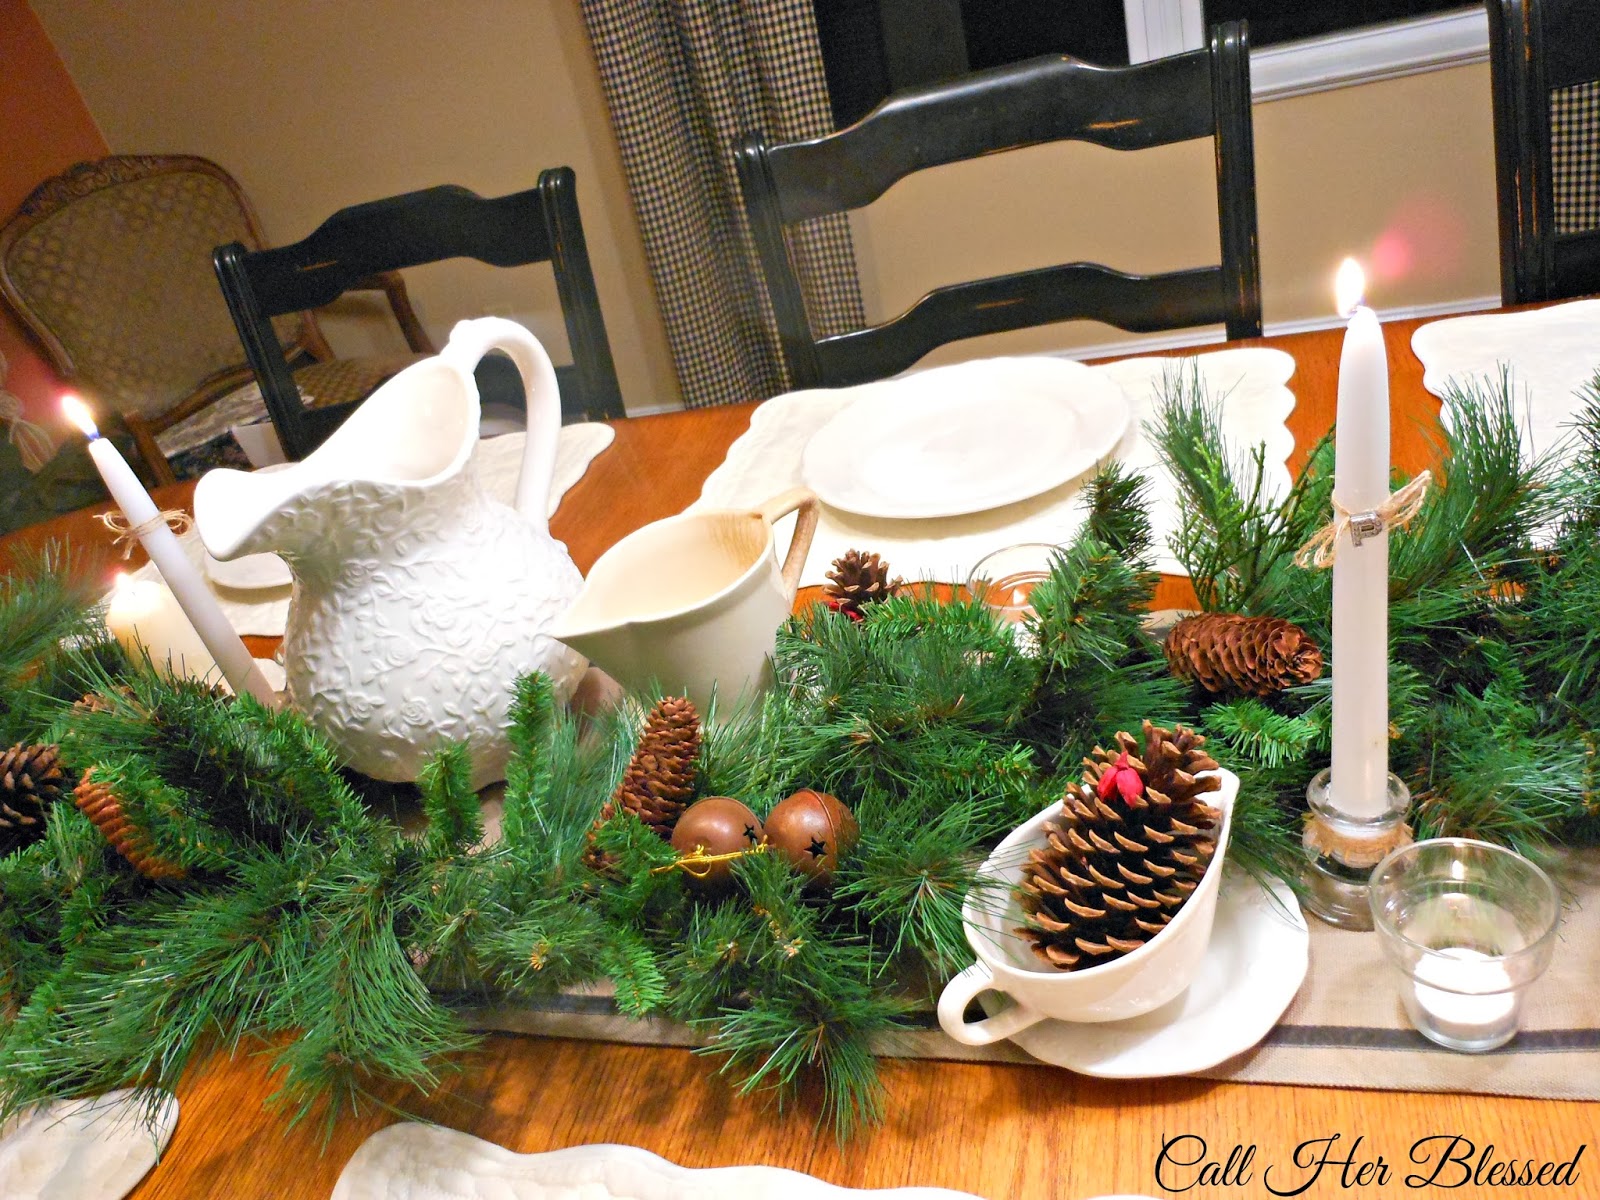
I filled my lantern with antique Christmas ornaments & pine cones
& tied it all up with a brown bow.


James bought me this snowman several years ago ...
I commented on how cute it was & next thing I know,
it was under the tree.


In years past, I've decked out the whole staircase with garland, but it just feels so busy.
I decided to scale back to this, added lights & it's perfect.


Above the patio door, a pine cone wreath hangs in between the antique cutting board & Mr. Antlers.


And one of my favorite pieces, the chalkboard that I repurposed
& the silhouette of my 3 handsome boys, made for me by a sweet friend.


Until Christmas 2014, Merry Christmas & a Happy New Year!


Monday, December 23, 2013

Peanut Butter Pretzels


Aren't these fun?!

You can put a batch together pretty quick & before you know it, you'll be snacking on these little cuties!


Here's how simple ... a 6 ingredient recipe:

Peanut Butter Pretzels

  • 1 cup creamy peanut butter {or use crunchy if you like}
  • 2 Tbsp. softened butter
  • 1/2 cup powdered sugar
  • 3/4 cup brown sugar
  • Pretzels
  • 1 bag of white chocolate chips {or milk chocolate if you like}

Directions:
Line a baking sheet with wax paper.
Mix peanut butter and butter until combined {use stand or electric mixer}.
Add sugars and beat until mixed well.
You should be able to roll the mixture into balls without sticking to your hands.
{If needed, add more powdered sugar until you reach a consistency that is easy to roll.}
Roll the mixture into small balls, about 1 teaspoon size, and place on prepared baking sheet.
Sandwich the balls between two pretzels and place in the freezer for 30 minutes.
Melt the chocolate in microwave, following package directions.
Dip each pretzel bite halfway into the melted chocolate and place on wax paper.


Now, if you haven't eaten them all, these are a great addition to a goodie basket/tin!
Here's how I shared these.


I lined a gift tin with wax paper & loaded it full of goodies:
Peanut Butter Pretzel Bites & Angel Face Cookies.
Put a bow on the top & you've got a wonderful gift.
My hubs took these to work to share with his team.


And if you didn't get the recipe yesterday for the Angel Face Cookies,

Hope you are enjoying this blessed season & thanks for visiting Call Her Blessed!


~~~~~~~~~~~~~~~~~~~~~~~~~~~~~~~~~~~~~~~~~~~~~~~~~~~~~~~~~~~~~~~~~~~~~~

Who doesn't love a party?!
You can find me here linking up with these great blogs.

Monday         Make It Yourself Monday     C.R.A.F.T     
Tuesday    A Bowl Full of Lemons    Titus Tuesday      A Stroll Through Life
Wednesday   Raising Homemakers        Savvy Southern Style         Adorned From Above
                   Women Living Well    The Thrifty Home     A Wise Woman Builds Her Home
Thursday    Making Home Base      Serving Joyfully     Lamberts Lately
Friday     Rooted in Thyme    French Country Cottage   The Thrifty Groove      Farm Blog Hop
Sunday    Nifty Thrifty Things    Suburbsmama    Sew Many Ways

A Tin Full of Goodies {& a recipe for Angel Face Cookies}

I love putting together goodie baskets, boxes, & tins.
Not just at Christmas, but anytime.


I love the variety, especially ... cause we all know how hard it is to narrow it down to just one gift
or just one kind of cookie or candy.
In this case, more is definitely more!

Here's a tin of Christmas treats I sent to work with my hubs.
He said it was well-received & devoured in no time flat.
Everybody loves a sweet treat during the workday, right?


I wanted to try out 2 new recipes & happily, they both were keepers!
I'll share the recipe for the Peanut Butter Pretzels tomorrow ...
for today, here's the recipe for the Angel Face Cookies.
{Isn't that the cutest name for a cookie ever?}


Angel Face Cookies

  • 1 cup softened butter
  • 1 cup shortening
  • 1 2/3 cups sugar
  • ½ cup brown sugar
  • 2 eggs
  • 2 teaspoons vanilla
  • 4 cups flour
  • 2 teaspoons cream of tartar
  • 1 ½ teaspoon baking soda
  • 1 teaspoon salt
Directions:
Preheat oven to 350 degrees. In a large mixing bowl, beat together shortening, butter, 
sugars, eggs and vanilla with an electric mixer.
In a separate bowl, combine dry ingredients. Stir into wet ingredients and mix well. Shape into balls.
Moisten the tops of the balls slightly with water, and dip them into sugar. 
Place sugar-side-up on ungreased cookie sheets. Bake at 350 for 12 minutes.


 Merry Christmas from Call Her Blessed

~~~~~~~~~~~~~~~~~~~~~~~~~~~~~~~~~~~~~~~~~~~~~~~~~~~~~~~~~~~~~~~


Who doesn't love a party?!
You can find me here linking up with these great blogs.

Monday         Make It Yourself Monday     C.R.A.F.T     
Tuesday    A Bowl Full of Lemons    Titus Tuesday      A Stroll Through Life
Wednesday   Raising Homemakers        Savvy Southern Style         Adorned From Above
                   Women Living Well    The Thrifty Home     A Wise Woman Builds Her Home
Thursday    Making Home Base      Serving Joyfully     Lamberts Lately
Friday     Rooted in Thyme    French Country Cottage   The Thrifty Groove      Farm Blog Hop
Sunday    Nifty Thrifty Things    Suburbsmama    Sew Many Ways

Friday, December 20, 2013

Simple Christmas in the Dining Room


There's something so appealing about simple.
Not too fussy.
Not overdone.
Our dining room table is all about simple this year.
Simple.


The first thing I started with was the new table runner that I got last year after Christmas
at Kohl's for 90% off.
That & my quilted poinsettias place mats.
Those were purchased with Christmas money from my mom & dad a couple years ago
{Walmart}.


I decided not to use all the garland that I usually put on our stairway, so I added a piece of it to the table.
As for my ironstone plates, 6 I found at Goodwill a year or so ago ... 
and 2 are from another set that was given to me by a sweet friend.


At this point, I began trying different things on the table until I finally had a light bulb moment ...
to use my collection of pitchers straight off the shelves in my china cabinet!


Several of them are ironstone & several of them are not.
I've picked them up at flea markets, antique stores, Home Goods, Old Time Pottery, & yard sales.


Each are unique in their own way.
The discolored & cracked ones are my favorites.


I am nuts about pine cones & use them throughout the house from fall til spring.
They were the perfect pairing with the pitchers.


I raided my candle box & tucked various ones here and there along the edge of the garland.
The tapers with the "P", along with the burlap-trimmed base were a gift from a sweet friend.


I used several of my ironstone saucers to sit candles on ... or underneath the small pitchers.


The clear glass votive candle cups were clearanced to a quarter each at Hobby Lobby this summer.


When it all came together, it quickly became one of my favorite tablescapes ever.
What's especially nice, none of this decor has to be moved to use the table ...
and do we ever use this table!
Not only do we eat dinner here nightly, we school here during the day.


Oh ... the little spiral standing book on the left is from Focus on the Family.
Different times during the year, I'll add it to the table.
It's a conversation starter ... questions for thoughts & discussions, meant to get the family talking.
Some are serious, some are fun.
We enjoy doing a few of these each night.


The china cabinet is hard to photograph, but here it is from across the table.
And yes, I took the pic before I remember to get my plates in the plate hangers.
They are just simple ironstone plates.


After taking most of my pitchers to use on the table, I had to reposition & add in a few things.
The snowman on the lower shelf is especially cute cause his orange carrot nose lights up.


All in all, it's a simple display of the things I love so much.
Hope you've enjoyed the tour.


“When we recall Christmas past, we usually find that the simplest things 
 - not the great occasions - give off the greatest glow of happiness.” 
Bob Hope

 
Merry Christmas
from
Call Her Blessed


~~~~~~~~~~~~~~~~~~~~~~~~~~~~~~~~~~~~~~~~~~~~~~~~~~~~~~~~~~~~~~~~

Who doesn't love a party?!
You can find me here linking up with these great blogs.

Monday         Make It Yourself Monday        The Better Mom       C.R.A.F.T     
Tuesday    A Bowl Full of Lemons    Titus Tuesday      A Stroll Through Life
Wednesday   Raising Homemakers        Savvy Southern Style         Adorned From Above
                   Women Living Well    The Thrifty Home     A Wise Woman Builds Her Home
Thursday    Making Home Base      Serving Joyfully     Lamberts Lately
Friday     French Country Cottage   The Thrifty Groove      Farm Blog Hop
Sunday    Nifty Thrifty Things    Suburbsmama    Sew Many Ways

Wednesday, December 18, 2013

Oh Christmas Tree

Oh Christmas tree, oh Christmas tree
Such pleasure do you bring me.
Oh Christmas tree, oh Christmas tree
Such pleasure do you bring me.


For every year the Christmas tree
brings to us all both joy & glee.
 Oh Christmas tree, oh Christmas tree
Such pleasure do you bring me.

Doesn't that just about sum it up?
I love Christmas trees ... and I love mine this year.
It turned out just as I envisioned it & I love it when that happens.


Watching it in the evening never gets old ... & honestly, I have no intentions of taking it down
anytime soon.


Nothing is new, with the exception of a couple strands of lights.
I left plenty of ornaments off ... picking & choosing what I wanted to add.
It's ok to do that, ya know ... just cause you own it doesn't mean it has to go on the tree.


 My favorite tree decorating trick is to add in a variety of other greenery.
It gives the tree dimension & can make an artificial tree look more like a real one.
I choose different shades of green & even add in some berry bushes.


 I love pine cones & have a'plenty of them tucked in the tree.
One of my favorite ornaments is the round wooden one in the above pic.
It was given to me by a lady I went to church with years ago.
It's Mary, Joseph, & baby Jesus & was hand-carved in Bethlehem.


I tied a few bows from some leftover burlap & stuck those in, here & there.
The burlap bows & bronzy sleigh bells alongside the fancy, glittery ornaments
mesh together for a rustic glam look.


Course, there's no forgetting the real reason for the season.
He's the one we worship & adore ...
For He alone is worthy ...
We give Him all the glory...
Christ the Lord.

Merry Christmas all~


~~~~~~~~~~~~~~~~~~~~~~~~~~~~~~~~~~~~~~~~~~~~~~~~~~~~~~~~~~~~~~~~~~~~~~~~

Who doesn't love a party?!
You can find me here linking up with these great blogs.

Monday         Make It Yourself Monday        The Better Mom       C.R.A.F.T     
Tuesday    A Bowl Full of Lemons    Titus Tuesday      A Stroll Through Life
Wednesday   Raising Homemakers        Savvy Southern Style         Adorned From Above
                   Women Living Well    The Thrifty Home     A Wise Woman Builds Her Home
Thursday    Making Home Base      Serving Joyfully     Lamberts Lately
Friday     French Country Cottage   The Thrifty Groove      Farm Blog Hop
Sunday    Nifty Thrifty Things    Suburbsmama    Sew Many Ways